Wednesday, June 29, 2011

Lettuce Bundles with Spicy Peanut Noodles

I admit that I'm a huge geek about keeping files of recipes from years and years of food publications. These are physical, paper files of pages that have been cut from magazines, and in some cases, the pages were copied if I needed to file the front of the page in one folder and the back in another. Yes, there are folders to categorize drinks, appetizers, salads, soups, sides, seafood, holiday menus, etc. I said I'm a geek about it. I get that. Now, there are two types of searches that happen in these files. One is the frantic search in which I remember a dish, and I know the recipe is filed in there somewhere, and I flip through every folder trying to find it. The other search type is the meandering, happy, just browsing search. That happens when it occurs to me that I haven't dipped into the files in a while, and I take a breezy stroll through food ideas of the past. It was that kind of search that led me to these lettuce bundles, and this gem of a fresh, light meal came from Living magazine in January 2001. Noodles in a spicy peanut sauce are cupped in butterhead lettuce leaves and topped with fresh, crunchy vegetables and chicken, and the big, pretty head of butterhead lettuce I had from my CSA was ready and waiting.

This is a versatile kind of meal. You can set out all the possible fillings and let everyone involved put together their lettuce bundles as they choose. You could use a rotisserie chicken, or grill some chicken, or skip the chicken entirely. Duck was also suggested in the original recipe. I went with soy sauce-marinated chicken that I roasted in the oven. Next, the peanut sauce should be made, and this is a pretty simple one compared to others I've tried. Into the food processor went garlic, ginger, chile paste, peanut butter, soy sauce, a little sugar, oil, lime juice, and water. It seemed like it was missing something, so I added some fish sauce and extra chile paste. For the noodles, I used vermicelli-style rice noodles which cook in boiling water in approximately one minute. Once drained and rinsed, the noodles were tossed with most of the peanut sauce. Some sauce was set aside for drizzling on top of the bundles. Then, you just have to slice and/or chop all the vegetables for toppings. I julienned cucumber, carrot, and serranos and thinly sliced green onion. I had some Thai basil leaves from my herb garden, so I used those as well.

For a meal on the light side, this packs lots of flavor thanks to the peanut sauce. And, those perfectly cupped leaves of butterhead lettuce are easy to bundle up with fillings. Everything can be served at room temperature, or if made in advance, it could also be served chilled. In fact, for a summertime lunch, the cold noodles and sauce from the refrigerator the next day were delightful in the crisp lettuce cups.


Sunday, June 26, 2011

Rigatoni and Tomato Sauce with Onion and Butter

I seem to lack the ability to grow tomatoes. I blame it on our yard. The front yard only gets the hottest, harshest sun of the day, and the back yard is too shaded. I have a few cherry tomato plants, but they’re only doing ok. They're certainly not producing record numbers of cherry tomatoes. I’ve accepted that I need to leave serious tomato growing to the pros. One of our local pros is Johnson’s Backyard Garden, and they’ve had an incredible tomato harvest this year. In fact, they have a bulk tomato sale that’s still in effect, and that’s how I came to have ten pounds of San Marzano’s. I set aside a few of them for oven roasting, and the rest were plunged into boiling water, skinned, and then seeded. By the end of the ten pounds, and really ten pounds isn’t even that much, it seemed like a lot of work, but when I tasted the tomatoes it was completely worth it. My first thought of how to use some of these tomatoes was that classic sauce I’ve heard so much about from Marcella Hazan. In Essentials of Classic Italian Cooking, she included what she calls “the simplest of all sauces to make.” She also mentions “none has a purer, more irresistibly sweet tomato taste.” She’s right about that. I tasted the sauce so many times as it cooked I risked not having any left to serve with pasta. This is her famous tomato sauce with onion and butter. There are exactly three ingredients plus salt and pepper, and it is a perfect sauce.

Obviously, the better the tomatoes, the better the sauce, and I was starting with those fabulous, fresh San Marzanos. As I said, I had peeled and seeded the tomatoes, and then I roughly chopped them. Two pounds were needed for one recipe of this sauce. The tomatoes went into a sauce pan with one onion that had been peeled and cut in half. Five tablespoons of butter was added, and then the sauce cooked. Occasional stirring helped break down the tomatoes, the liquid reduced, the sauce thickened, the butter melted, the onion added its flavor, and the simplest, most delicious sauce came to be. The onion was removed and seasoning was adjusted before the sauce was used. Marcella recommends this sauce for gnocchi or penne or rigatoni. I chose rigatoni which was boiled and then tossed with the sauce. On the plate, I added shards of parmigiano reggiano and ribbons of basil.

This sauce could be made with canned tomatoes, but the flavor of fresh tomatoes is so much better. The butter makes them even sweeter, and the onion rounds out the savoriness. I found it impossible to not taste the sauce each time I stopped by the pan to stir it, and once tossed with pasta, the bright, freshness of it was unbelievable. And, the very good news is that I have more of those peeled and seeded tomatoes sitting in my freezer just waiting to be turned into sauce.


Wednesday, June 22, 2011

Boston Cream Pie

It's not that Kurt doesn't think about mealtime, but he doesn't spend nearly as much time thinking about food as I do. He almost never asks what's for dinner or what's for dessert and very rarely makes any special requests. He says he trusts I have it covered, and it's true that I usually do. However, once in a while, especially when I've been on a light and healthy kick, he'll say something like "are we having Boston cream pie for dessert?" He loves it. I have made it a time or two, but since I'm always trying new recipes, it hadn't appeared on our table in years. So, when I was reading my review copy of Maida Heatter's Cakes and came upon her version of Boston cream pie, I had to give it a go. I mentioned previously how much I trust Maida's recipes, and she claimed this was the best version of Boston cream pie she's tried. Sold. She noted that she doesn't know why it's called a pie, and neither do I.

Two layers of sponge cake are filled with vanilla pastry cream, and the pastry cream is the first item to prepare so it can be chilled. This pastry cream was made in the usual way with eggs whisked in a bowl and set aside. Flour, salt, and sugar were combined in a saucepan, and milk was whisked into the mixture. That was brought to a boil over medium-low heat and stirred until thick. The hot milk mixture was slowly whisked into the eggs in the bowl, and then that was poured back into the saucepan where it was heated while stirring constantly. Once thickened, vanilla and almond extracts were added off the heat. The pastry cream was transferred to a bowl and left to cool with parchment paper pressed directly on the surface to prevent a skin from forming. The sponge cake was simple enough. Egg whites were whipped with some sugar until they held a soft shape, and egg yolks were mixed separately with sugar until very light in color. Vanilla, lemon juice, and some cold water were mixed with the yolks. The yolks were folded into the whites, then the dry ingredients including flour and baking powder were folded in as well. Last, melted butter was just barely folded into the batter. The batter was baked in a nine-inch round pan, and next time, I think I'll use an eight-inch pan because it spread out somewhat thin. Once the cake was baked and cooled, it was sliced in half and filled with the chilled pastry cream. The filled cake was topped with a simple chocolate ganache made with chopped semisweet chocolate and cream.

This was exactly what's expected from a Boston cream pie. The cake was tender and fluffy, the filling was rich and nicely vanilla-flavored, and the chocolate ganache was the perfect contrast on top. I don't know if it was the best Boston cream pie ever, but I'll probably eventually try several others for comparison's sake. Most importantly, Kurt was thrilled to open the refrigerator and see what was for dessert.


Sunday, June 19, 2011

Poached Shrimp with Watermelon Curry and Masa Cookie

It’s time for summer fun, summer vacations, and summer food. To celebrate the beginning of the season, Tribeza has organized an event, the Summer Solstice Chef’s Table Series from June 27 to June 29, to showcase menus inspired by this time of year. At eight different Austin restaurants, guests will have an opportunity to dine with the chef and enjoy special dishes created just for this event. Trio is one of those participating restaurants, and Chef Todd Duplechan’s menu will include poached gulf shrimp with watermelon curry and a masa cookie, warmed loch salmon with braised market vegetables and lemon aioli, and bacon wrapped lamb loin with heirloom squash and black garlic custard. I had the opportunity to stop by the kitchen at Trio, talk with Chef Duplechan about the Chef’s Table dinner, and watch as he showed me how to prepare the poached shrimp dish. We talked about the Texas heat, spices and chiles, what grows locally, and he taught me a few interesting cooking techniques along the way.

Here in central Texas, Chef Duplechan likes to cook what grows nearby, and that fits with his idea of creating a new southwestern cuisine. He says “there’s more to southwestern cuisine that blue corn chips.” Rather than taking influence solely from Mexican cooking as most southwestern dishes do, his creations brings together elements of cooking from various hot weather climates around the world. By taking cues from Southeast Asia, his dishes have a lightness that’s especially welcome during our hot summer season. A perfect example of how these ideas come together is this poached shrimp dish. The shrimp are from the Gulf and as many of the other ingredients as possible were procured locally.

Watermelon, which is a well-loved Texas summer fruit, is taken in a new direction via Southern India for this curry sauce. Making the sauce began with mustard seed oil being warmed in a saute pan. Cumin seeds were toasted in the oil, ground coriander and ground mustard seeds were added, finely diced green chiles and ginger came next, and this mixture cooked just until the chiles softened. Next, turmeric and pureed watermelon were added, and the sauce was allowed to reduce and thicken. The watermelon was not strained, so it retained some texture. I was offered tastes as the sauce reduced and Chef Duplechan explained how the watermelon takes on a squash-like flavor when cooked. It also becomes sweeter as the water evaporates. Once reduced, lime juice and zest were added which cut the sweetness, and chopped cilantro was added. In the end, the sauce had an underlying sweetness, bright lime flavor, and nice notes of heat from the chiles and ginger.

Next, we talked about the shrimp. These were big, fresh, gorgeous ten per pound, Gulf shrimp. They had been shelled, deveined, and skewered to make them straight. They were going to be oil poached but not in plain oil. This was one of those cooking tips that’s genius, that adds so much flavor, and that I never would have thought to do. The oil had been treated like a stock. The shrimp shells and some of the same spices used in the curry had been cooked in the oil and then strained out before the oil was used to poach the shrimp. I tasted the oil before the shrimp were placed in it, and it was so flavorful I knew the shrimp were going to be phenomenal. To gently poach shellfish in oil, the temperature needs to be no higher than about 125 degrees F. Duplechan checked the temperature and maintained the low heat by pulling the pan with the oil off the heat when the temperature climbed too high. He explained the good news about poaching shellfish is that you have a long window of doneness. You can watch as the shrimp turn from translucent to opaque white, and you want to pull them from the oil before the opaque-ness reaches the center of the shrimp. They’ll finish cooking from residual heat once removed from the oil.

One last element for this dish was a masa cookie. Masa is a typical southwestern ingredient, but it was given a new twist here. It was baked into a tuile after being mixed with sugar, and ground coriander and mustard seeds. No water was added. The dry mixture was spread on a baking sheet, and as it heated in the oven, the sugar melted and the tuile formed. The big, thin cookie then easily broke into pieces. It was a sweet, savory, corn-flavored bit of crunch.

The dish was plated with a layer of arugula, then the watermelon curry, the shrimp were pulled from the skewers and placed on the sauce, the masa cookie was broken into shards which were strewn about, and last, a little drizzle of the poaching oil was added. My reaction upon tasting the finished dish was a wow. That was perfectly cooked, juicy, plump shrimp, and all those wonderful flavors in the watermelon curry accompanied it nicely. The fresh, bright flavors and slight edge of heat, the mix of textures with the crisp masa cookie, and the lightness of it all made a stellar combination. And, this is just one of the courses offered at Trio for the Chef’s Table Series.

For more information about the menus, the locations, and the opportunity to sit and dine with some of Austin’s top chefs, see the Tribeza site.


Wednesday, June 15, 2011

Grilled Peach Sundaes with Balsamic Fudge

Despite the fact that everything is supposed to be bigger in Texas, Texas-grown peaches are kind of small. I would argue, however, that their flavor is very big. Not many other fruits compare to a perfectly ripe peach. I mentioned the other day that I’d been reading Farmers' Market Desserts, and most of the recipes in that book include suggestions for alternate fruits. There’s a dessert called grilled fig sundaes with balsamic fudge, and I took note of the suggestion to use peaches or plums instead when in season as I had just received some peaches from my CSA. Whichever type of fruit is used, each piece is cut in half and skewered onto a rosemary sprig and grilled. The fruit skewers only remain on the grill long enough to soften and brown in spots and take on some smokiness. And, the fruit is only one part of this dessert. There’s also ice cream which is a natural with warm fruit, and then there’s the sauce. This is no old-fashioned, ice cream parlor kind of sauce. It’s a tangy, sweet reduction of red wine, balsamic vinegar, and sugar, and it makes this a sundae with grown-up flavor.

I’m sure both figs and plums would work very well for grilling. The peaches I used were nicely ripe which means they were a little tender and had to be pierced and skewered carefully. The pieces of fruit didn’t stay in place very well on the rosemary sprigs. They tended to flip around the stem and would have been difficult to turn on the grill. To fix that issue, I also pushed a wooden skewer through the fruit behind each rosemary sprig. With two skewers in place, the fruit stayed put and was easy to turn. To start, you should soak your skewers in water so they won’t burn on the grill even though any rosemary leaves left on the ends will catch the flame regardless. Meanwhile, you can begin the sauce. Good balsamic vinegar, red wine, and sugar, and the amount of sugar depends on whether you’re using a dry wine or a sweet, dessert wine, were stirred together in a saucepan. Over a bare simmer, that mixture was left to reduce by half which took about 15 minutes. It thickened as it cooled. Then, the fruit was brushed with olive oil, seasoned, and grilled for a few minutes per side, and the timing will depend on how hot your grill is. The goal is to just allow the fruit to soften and begin to brown. I served the grilled fruit and sauce with vanilla gelato, and I always follow the recipe from Demolition Desserts. It includes only two eggs and is made with more milk than cream making it slightly lighter than other vanilla ice cream recipes I sometimes use.

Savory flavors from the grill smoke and rosemary challenged the sweetness of the peaches and gelato in a delicious way. Likewise, the sauce was a mix of sweet and tart, rather than just sweet, which nudged the taste of the gelato in the direction of cheesecake. Plain, ripe, summer peaches are a pleasure, but if you’d like to dress up a few of them for dessert, I highly recommend this sundae.


Sunday, June 12, 2011

My Calabria: Rustic Cooking of Southern Italy

It’s no secret that Italian cooking is one of my favorite styles, and I often mention my penchant for spicy flavors. So naturally, the food of Calabria, with abundant use of both sweet and hot peppers, is something I’d like to know better. On June first, Rosetta Costantino, author of My Calabria, taught a class at Central Market Cooking School, and I was invited to attend. She presented four dishes from the book while sharing stories about growing up in Calabria and her family’s farm. They grew everything they ate and made their own cheese and sausages. Fresh, seasonal cooking was a given. When she was fourteen years old, her family moved to California and brought their food traditions, along with vegetable seeds, to their new home. They continued to grow their own vegetables and make their own ricotta and pasta as they always had. It was a delight to hear the stories of southern Italian culture translated into Bay Area California living while observing how to make fresh pasta from only flour and water. I can’t wait to dive into the book and try several other dishes after watching a few them being prepared in the class.

First, polpette di melanzane or crispy eggplant ‘meat’balls were demonstrated. Rosetta told us that most cooking in Calabria has always been done by boiling or frying because ovens aren’t all that common. When she was growing up there, wood ovens for bread were shared but most home kitchens included only stove tops. Chunks of unpeeled eggplant were cooked in boiling water, and Rosetta said she never bothers salting and draining eggplant as some do. The cooked eggplant was drained and pressed to remove as much water as possible before being finely chopped by hand. A food processor would result in too finely chopped and mashed eggplant, so chopping by hand is important. That was then mixed with breadcrumbs, grated pecorino cheese, parsley, minced garlic, salt and pepper, and an egg. One inch sized balls were formed from the mixture and rolled in more breadcrumbs. At this point, the polpette can sit in the refrigerator for a day if you wanted to make this in advance. Just before serving, the polpette should be fried in olive oil. They make fabulous, little hors d’oeuvres but could also be served in tomato sauce with or without pasta.

Making fresh egg pasta is, for me, just about the most enjoyable thing ever to create in the kitchen. Turning the handle on my pasta machine that clamps down to the counter and holding the dough as it becomes thinner and longer with each pass through the rollers makes me happy every time I do it. So, I was very curious to learn about Calabrian pasta which is made with no eggs and is rolled and shaped by hand without being passed through rollers of any machine. Rosetta explained that it’s better to let the dough be on the dry side because you can always work in tiny amounts of additional water, but once the dough gets too wet it’s nearly impossible to correct. You just keep kneading the flour and water mixture by hand until the consistency feels right, and then you let the dough rest for twenty minutes or so. For the cavatieddi, she rolled pieces of dough into thin ropes and then cut the ropes into about two inch lengths. Then, by pushing and quick pulling with two or three fingertips, the cut rope of dough was shaped into curled tubes. Interestingly, even though this was fresh pasta, it takes about fifteen minutes to cook.

A simple but delicious sauce for the pasta was made by roasting some fresh, peeled and seeded tomatoes with olive oil, salt and pepper, breadcrumbs that had been mixed with garlic, herbs, and some grated pecorino, and ground dried hot chiles. Rosetta grows her own chiles, dries them, and grinds them. She spoke about the juicy, dark red, homegrown tomatoes she's accustomed to using. She said even with just picked tomatoes, she’ll leave them sitting for a few days to allow them to deepen in color and become extra ripe before using them for this recipe. Once roasted, stirring the tomatoes a few times causes them to break into pieces and form a chunky sauce. The cooked pasta was added directly to the roasting pan with the tomatoes and tossed to combine. The pasta had a slightly firmer bite than egg pasta does, and the thick, roasted tomato sauce coated it perfectly.

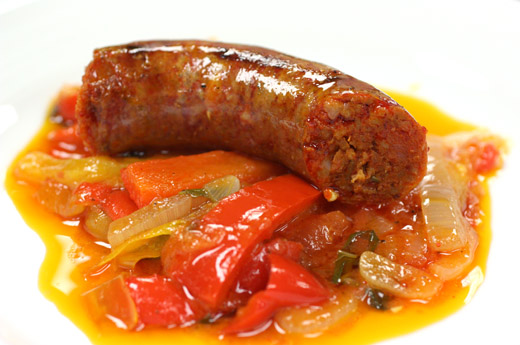
Next, a traditional Calabrian sausage was prepared from pork butt with surface fat, wild fennel seed which has a slightly different flavor than cultivated fennel seed, ground hot pepper, and Calabrian paprika. The meat was ground, and the spices were mixed in by hand. Rosetta explained that you know the mixture is well-combined when it becomes a bright red color and your hands are also red. The preferred shape for the sausage is one long, coiled piece that is tied together with kitchen twine. The big spiral is easy to grill and turn when it’s tied. The grilled sausage was served with peperonata piccante which was a slowly sauteed mixture of sweet and hot peppers, onion, garlic, tomatoes, and basil. The sweet, spicy mix of tender vegetables seemed to melt upon being tasted, and since I’d passed my piece of sausage along the person sitting next to me, I wished I had a piece of toasted, rustic bread on which to scoop the peperonata. Obviously, the sausage isn’t something I’ll be making at home, but it was a brilliant color that looked beautiful on top of the sauteed peppers.

The last dish of the evening was gelato al cioccolato con peperoncino. A rich chocolate base was made for the gelato, and once it cooled ground hot red pepper was added before it was churned in an ice cream machine. The flavor was deeply chocolaty with a slow burn that surprised you at the end of each bite.

Rosetta also leads culinary tours combined with cooking classes in Calabria, and the next one is this September. It’s a nine day tour including porcini foraging in the mountains, observing cheese making, as well as wine tastings and olive oil tastings. You can also learn more from Rosetta at her blog Calabria From Scratch.


Wednesday, June 8, 2011

Beet and Quinoa Salad with Pecan-Crusted Goat Cheese

A couple of days ago, I talked about the beginning of wild salmon season, and today, I'm talking about the end of beet season. I think I've received the last beets I'll see from my CSA until fall, and I realize I do mention beets frequently here, but I really enjoy the flavor, the colors, and how nutritious they are. We're lucky to have a nice, long, growing season for beets since they only disappear during our extreme summer heat but grow well for the rest of the year. And, with locally grown beets, the green tops are always fresh and ready to be used along with the roots. When I saw this quinoa and beet dish on the NY Times site a couple of weeks ago, I knew it would be a great way to use my last spring beets. It was called a pilaf, but I served it more like a salad. Either way, it's very easy to prepare, and I added one little, extra step to gussy up the goat cheese. I rolled it in chopped pecans before slicing it into rounds and was happy to have the added flavor from the nuts. This was great served at room temperature as well as chilled from the refrigerator.

The beets were first roasted, and the roasting time depends on the size of the beets. Mine were kind of large, so after drizzling on olive oil and seasoning the cleaned beets with salt and pepper, I wrapped them in parchment and then foil and let them roast for about an hour and fifteen minutes at 400 degrees F. Once they're cool enough to handle, the skins slip off easily, and you can use a paper towel to remove them. Then, the beets are ready to be chopped, and they can be refrigerated until you're ready to complete the dish. The recipe suggested blanching the beet greens and draining them before sauteeing, but I skipped the blanching step. They cook quickly, so I just added them to the saute pan after garlic had been briefly cooked in olive oil. Crushed caraway seeds were supposed to have been added as well, but I skipped them. Meanwhile, white quinoa was cooked in a saucepan. Once the beet greens were wilted, the quinoa and chopped beets were added. I served the quinoa mixture with rounds of pecan-crusted goat cheese on top.

The white quinoa took on the pink color of the beets as they were stirred together in the saute pan, and the mild, nutty flavor went well with the earthy beets and greens. It was great to get to use both the tops and the roots of the beets in one dish. I'll be making this again as soon as our local beets reappear.


Sunday, June 5, 2011

Salmon with Cucumber Salad and Soy-Mustard Dressing

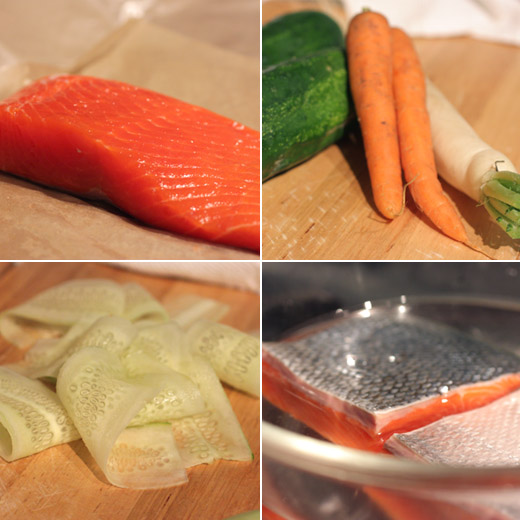
This recipe is from the May 2009 issue of Food and Wine. In the magazine, the dish was made with grouper, and that white fish fillet was a nice, bright back drop for the very thinly sliced vegetables that were placed on top of it. The look of the dish and the fresh, light nature of the salad had stuck in my head for two years. I went off to the fish counter planning to bring home a thick, white fillet of something, but then instead, I saw the first wild salmon of the season. The very first salmon of the season is always so good, and it was shiny and dark pink and couldn’t be refused. So, my version has a pink back drop for the salad, but the flavor was everything I’d hoped it would be. Speaking of salmon, I know I’ve mentioned this before, but it bears repeating. I learned a trick for quick brining salmon from Ad Hoc at Home. In a cold solution of one part salt to ten parts water, salmon fillets are left to soak for about ten minutes. This brief brine seasons the fish and prevents the soluble protein from coagulating into white gunk when it’s cooked. Given the expense of first of the season wild salmon, I don’t mind taking this extra step to ensure the cooked result will be as good as it can be.

While the fish sat in the cold brine, the sauce was made in the blender. It was a puree of soy sauce, rice vinegar, mirin, sake, whole-grain mustard, some garlic, and grapeseed oil. Half of the cucumbers were peeled and thinly sliced lengthwise on a benriner, and those became a folded base for the dish. The other half of the cucumbers were julienned along with carrot, daikon, and a red chile. Sliced garlic and shallot were fried until browned, removed from the oil, and then that oil was used to cook the fish. To serve, some soy-mustard dressing was spooned onto the plate, the long pieces of cucumber were folded into a stack, the salmon sat on them, and the julienned vegetables were the crown on top with a garnish of fried shallot, garlic, and black and white sesame seeds.

I have to go on a bit more about that brining technique because it really does perfectly season the fish, and the fish does look much better when there’s no white protein oozing from the fillet. The fresh, crunchy vegetables were just the right accompaniment, and the soy-mustard dressing added lively flavor. I know I would like this just as well with a white fish fillet, and the color combination on the plate would be striking, but this was a fabulous use of this season’s first salmon.


Thursday, June 2, 2011

Blackberry Buckwheat Tea Cake

Early spring means strawberries, and the season for them is short here. Strawberries have always been my favorite fruit, but this year, they had a contender. Blackberries start showing up at farmers’ markets at the tail end of strawberry season, and they only make a few appearances before they’re gone for another year. I started looking for them about a week too early wanting to make sure I didn’t miss them. Then, at last, on a Saturday morning a couple of weeks ago, there they were in baskets all lined up and waiting, looking juicy, perfectly ripe, and ready for dessert. No disrespect to the strawberries, but I was just more eager for blackberries this year. I’d been reading the review copy I received of Farmers' Market Desserts by Jennie Schacht, and the Basket of Berries chapter had given me several good ideas. Just about any berries can be used in these desserts even though several are shown with strawberries. The strawberries and cream roll cake looked good as did the mixed berry pavlovettes with lemon-lime cream. But, when I read the recipe for the strawberry buckwheat tea cake and learned that it was made with browned butter, my decision was made. I used those prized blackberries instead of strawberries of course. The inspiration for this tea cake was strawberry and buckwheat pancakes. By adding browned butter to the cake batter, it becomes reminiscent of a buttery stack of pancakes. There’s also thick yogurt in the cake giving it great texture.

The first step of this recipe is aromatherapy in the form of browning butter. One stick was melted and then swirled in the pan as it became nutty-smelling and more delicious by the minute. That was left to cool while AP flour, buckwheat flour, sugar, baking powder, baking soda, and salt were combined. Then, Greek yogurt, eggs, and vanilla were added to the butter, and that mixture was stirred into the dry ingredients. Last, the precious blackberries were folded into the batter, and the batter was spread in a square baking pan. Now, some of the berries were to be set aside and tossed with sugar so the juices would start running, and then the berries and resulting juice could be used to top the whipped cream served on the pieces of cake. I have a thing about not wanting much sugar with my berries because I like them just the way they are with a little tartness peeking through here and there. So, I left the remaining berries plain and there were no running juices to drip over the whipped cream. I did, however, follow the suggestion at the beginning of the book to add creme fraiche to the whipped cream.

The book offers ideas for fresh fruit from every season as well as dried fruits and nuts. There’s a first-prize peach pie that promises to deliver a perfect proportion of crust to filling. There’s also a sweet cornmeal cake made with fresh corn kernels and berries that I have to try while I can get local corn, and I’ve already made one of the ice cream desserts that I’ll post soon. This book may make you eager for certain growing seasons to arrive, but when they finally do, you’ll have some great desserts to make.


Blogging tips